Tesla Model S GEN1 Rear HVJB: Difference between revisions
| Line 34: | Line 34: | ||
The HVIL Loop | The HVIL Loop | ||
[[File:2012 ModelS LHD Release 24.2-3b.png|alt=Telsa Model S GEN1 HVIL Schematic (amended).|thumb|600x600px|Telsa Model S GEN1 HVIL Schematic (amended): shows the lid switches explicitly called out, and the "parked" vs "installed" HVIL Loopback on Second/Slave OBC. | [[File:2012 ModelS LHD Release 24.2-3b.png|alt=Telsa Model S GEN1 HVIL Schematic (amended).|thumb|600x600px|Telsa Model S GEN1 HVIL Schematic (amended): shows the lid switches explicitly called out, and the "parked" vs "installed" HVIL Loopback on Second/Slave OBC.]] | ||
Like other HV assemblies on the Model S, the Rear HVJB has a Lid Reed Switch, activated by a magnet on the cover, that breaks the HVIL Loop when the cover is removed. The Rear HVJB has a short harness from this Lid Reed Switch, which is always plugged into the Single or Master OBC to maintain the HVIL Loop. | Like other HV assemblies on the Model S, the Rear HVJB has a Lid Reed Switch, activated by a magnet on the cover, that breaks the HVIL Loop when the cover is removed. The Rear HVJB has a short harness from this Lid Reed Switch, which is always plugged into the Single or Master OBC to maintain the HVIL Loop. | ||
| Line 40: | Line 40: | ||
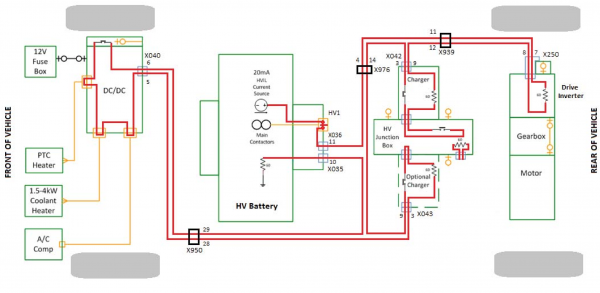
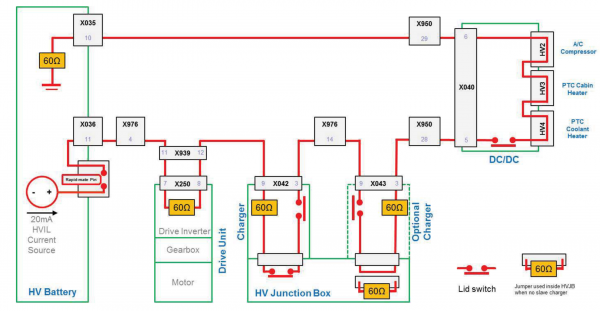
[[File:SB-10052449-4313 HVIL Diagnostic Guide 01-1b.png|alt=Tesla Model S GEN1 HVIL circuit overview, from Tesla Service Bulletin SB-10052449-4313, pg. 1.|thumb|600x600px|Tesla Model S GEN1 HVIL circuit overview, from Tesla Service Bulletin SB-10052449-4313, pg. 1.| | [[File:SB-10052449-4313 HVIL Diagnostic Guide 01-1b.png|alt=Tesla Model S GEN1 HVIL circuit overview, from Tesla Service Bulletin SB-10052449-4313, pg. 1.|thumb|600x600px|Tesla Model S GEN1 HVIL circuit overview, from Tesla Service Bulletin SB-10052449-4313, pg. 1.|left]][[File:SB-10052449-4313 HVIL Diagnostic Guide 08-1b.png|alt=Tesla Model S GEN1 HVIL circuit overview, from Tesla Service Bulletin SB-10052449-4313, pg. 7.|thumb|600x600px|Tesla Model S GEN1 HVIL circuit overview, from Tesla Service Bulletin SB-10052449-4313, pg. 8.|none]] | ||
Revision as of 02:40, 24 March 2023
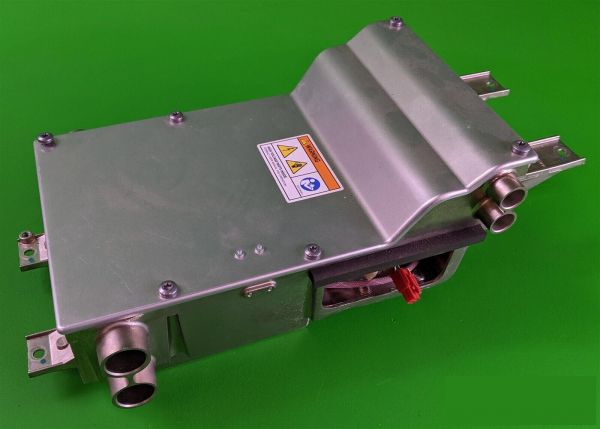
Overview
The Tesla Model S GEN1 Rear HVJB was a High Voltage Junction Box found in the all 2012 through late 2013 Model S. It is centrally located under the rear seat frame, and the Single or Dual GEN1 On-board Charger(s) (OBC) are located to the right and left of it. It was replaced via gradual phase-in by the GEN2 Rear HVJB starting around Oct2013, when the GEN2 On-board Chargers were introduced; the GEN1 & GEN2 Rear HVJBs are not interchangeable, physically nor electrically.
It functions as a junction for connections to these subsystems:
- Traction Battery Pack (HV DC)
- Drive Unit ("Inverter") (rear only, as the Dual Motor option wasn't offered during the GEN1's lifespan)
- Charge Port (AC and DC input)
- DC-DC Converter (GEN1, which also functioned as the Front HVJB)
- On-Board Charger(s) (GEN1 Chargers only)
Connections
HV
All HV connections are well documented by the "Theory of Operation" image below. All are bolted connections.
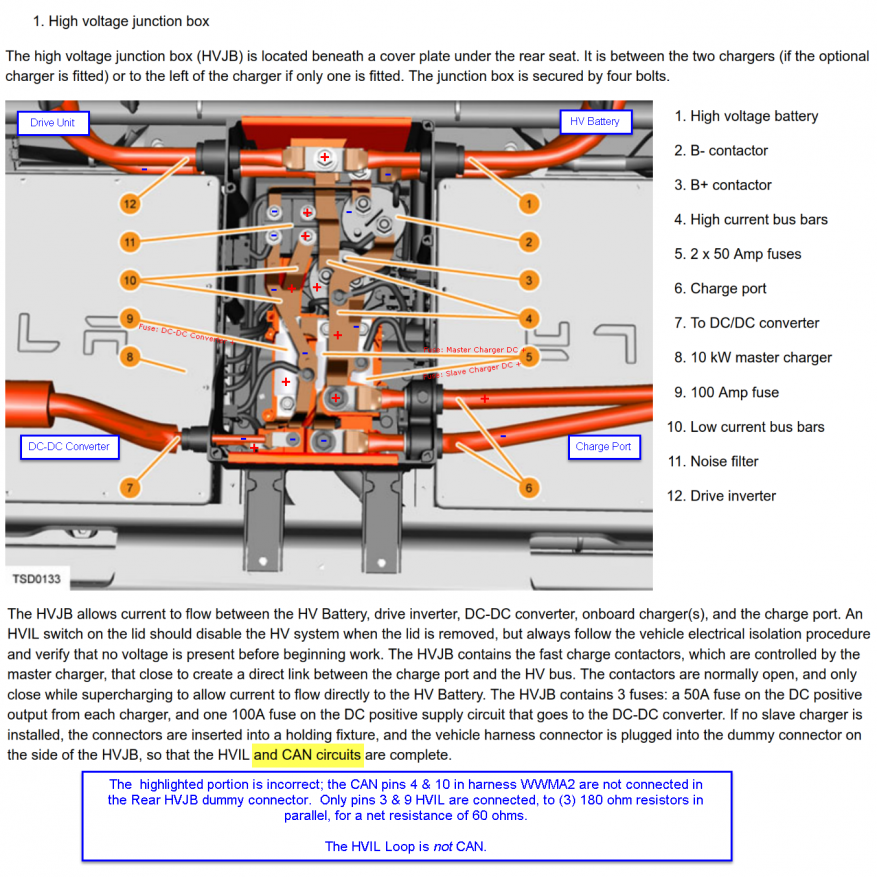
LV
Depending upon whether Single or Dual OBCs are installed, either (1), or (5), of the LV connectors will not be in use. Extra/unused internal harnessed connectors have "parking" places to stow unused connectors. The various LV connectors are detailed below.
Logic "dummy" connector
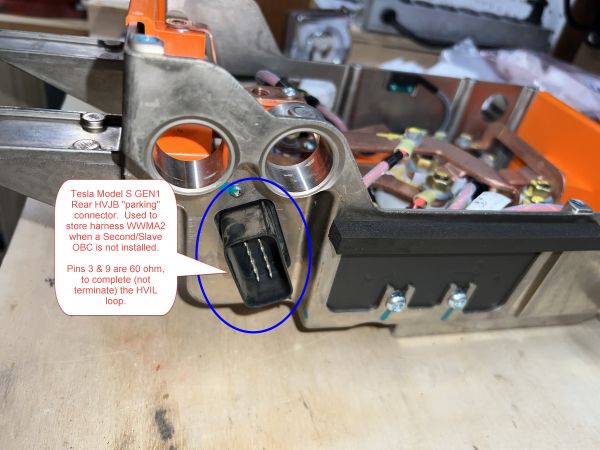
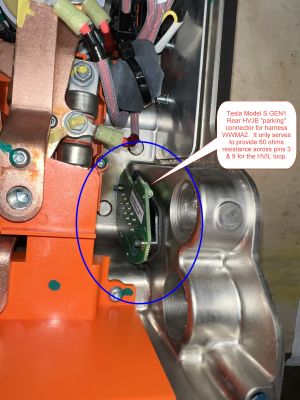
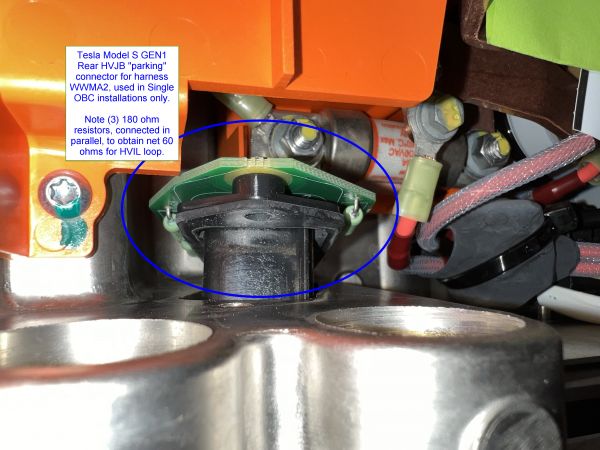
This is a panel-mount Molex MX150L Panel-Mount PCB 19428-0001 plug. For installations where there is only a Single OBC installed, it provides a place to "park" the unused harness WWMA2 that would normally be connected to a Second/Slave OBC.
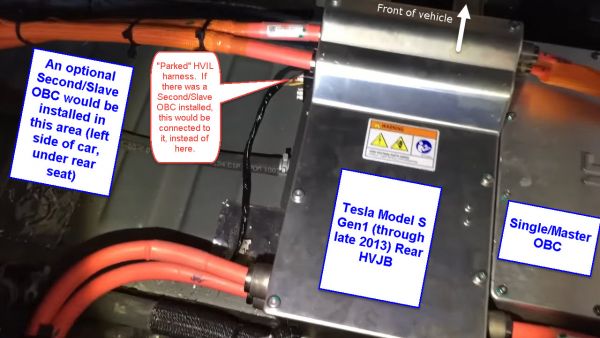
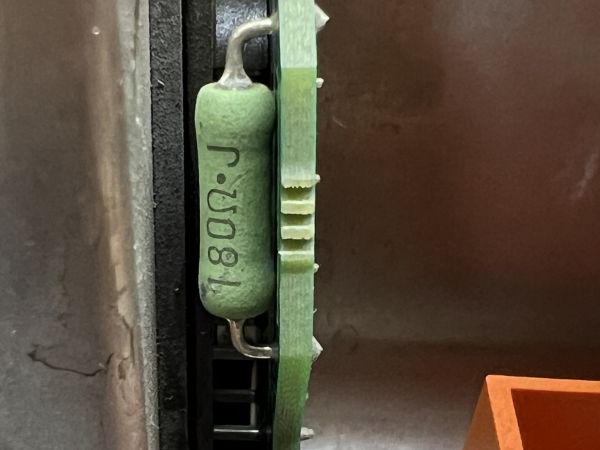
It has a small PCB soldered to its rear, which contains ONLY (3) 180 ohm resistors, wired in parallel, to provide a net 60 ohm path for the HVIL Loop, on pins 3 & 9. See HVIL section for details on how this connector is used.
The following images showcase this "parking" connector on the Rear HVJB for harness WWMA2, which if not connected to a Second/Slave OBC, must be connected to this "parking" connector in order to obtain a 60 ohm resistor to complete the HVIL loop. The BMS maintains a constant current in the HVIL loop, and will not allow the contactors to close (or remain closed) if the correct resistance isn't measured in the HVIL loop[1]. Telsa's various documentation from this era have several inaccuracies when verified against actual vehicles; do not rely upon documented pinouts.
HVIL
The HVIL Loop
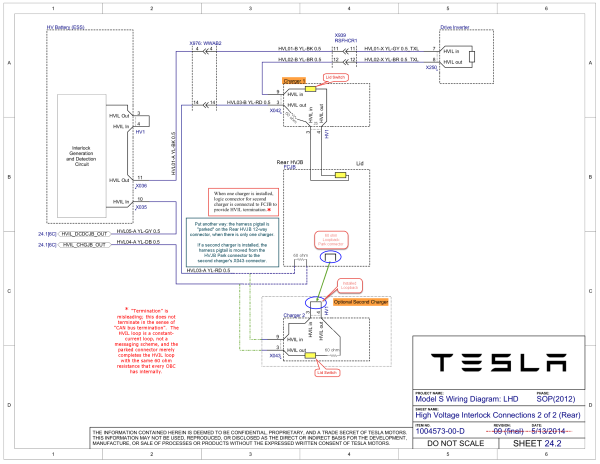
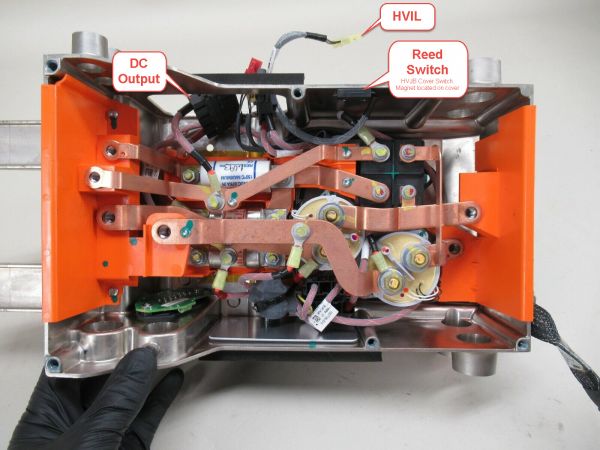
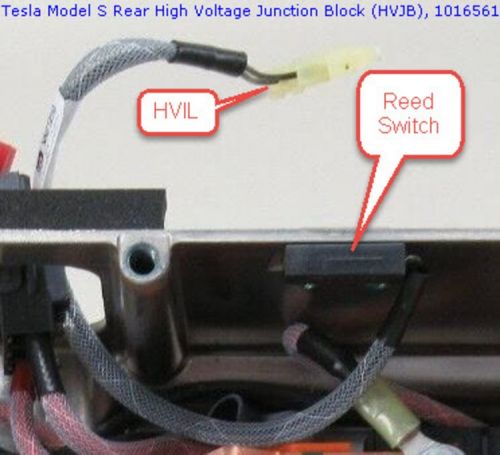
Like other HV assemblies on the Model S, the Rear HVJB has a Lid Reed Switch, activated by a magnet on the cover, that breaks the HVIL Loop when the cover is removed. The Rear HVJB has a short harness from this Lid Reed Switch, which is always plugged into the Single or Master OBC to maintain the HVIL Loop.
The below two pictures show the GEN1 Rear HVJB's Lid Reed Switch, which had a relatively high failure rate[2] that caused shutdowns, error messages, and start failures:
- Tesla: The loopback harness, Tesla 1101371-00-A, is included/stored inside all Tesla Model S GEN1 Rear HVJB in an internal "parking" socket, when only a single OBC is provisioned.
Errata
GEN1 Rear HVJB Dimensions:
- Weight: nn lbs (nn kg)
Tesla Part Numbers (TPN):
- 1016561